Physical Product
Let say that we want to sell a pair of shoes. We want to gather some information about the customer, like the size of the shoes, and we want to send the shoes to the customer's address. We also want a private channel to be created to update the customer about the status of the order. We also want variants on our shoes with specific stock for each variant. So let's see how we can do that with ShopBot.
Creating the product
First, lets go on the Dashboard and let's click on the side bar, then on Create a Product. In our case the product will be a role that will be added to the buyer as soon as he paid to mark it for the staff. So we will choose Discord Product as the product type.
First step
Lets Setup the basic product information. Here are the things that I will fill in for my product, you can of course customize it as you want.
- Product Name :
ShopBot Nice Shoes - Product Description :
Get your pair of ShopBot Nice Shoes! Comfortable, stylish, and perfect for any occasion. Available in multiple sizes to fit your needs. Order now and step up your shoe game! - Product Embed Color :
#FF5733(A vibrant orange color to make it stand out) - Product Thumbnail : (A small image representing the product, e.g., a logo or icon)
- Product Image : (An optional larger image showcasing the product)
- Product Stock :
Unlimited(This will be controlled by the variants stock) - Purchase Limit :
Unlimited(Each customer can buy an unlimited amount of shoes) - Product Variants :
Multiple(Because we have multiple sizes for our shoes)
Setting up the variants
In the variants section, we will create the different sizes of our shoes. For each variant, we will set a specific stock. Here are the variants that I will create:
- Variant 1 :
Size 38- Stock :10 - Variant 2 :
Size 39- Stock :15 - Variant 3 :
Size 40- Stock :20
The customer will need to choose a variant before purchasing the product. If the variant is out of stock, the customer will not be able to purchase it.
As you can see I've set a custom Product Embed Color, it will make my product stand out a bit more than the others. I've also set a Product Thumbnail to better illustrate my product.
Second step - Payment Information
Here, we will need to put our product payment information to be able to be paid each time somone buys our product. In our case, I will select Stripe as a payment provider and I will put my Stripe account id in the Platform ID input. If you don't know how to get your Stripe account id, please check this guide. Then I will put my product price and currency. You can use any payment provider, it's really up to you !
Here are a few notes about the different payment providers and their PlatformID :
Payment Provider / ShopBot
For ShopBot you will need to select the server that the product will be linked to. And that's all ! The currency will be STKN (ShopBot Token) and the price will be the amount of tokens that you want to sell your product for.
Payment Provider / Paypal
For Paypal, you only need to put your VALID Paypal email address that is linked to your account. If you populate a wrong email, no one will be able to have a checkout link.
(Once your product is created and generated, I strongly recommand that you click on "buy" on your product to see if a checkout link is created. If not, modify your product Paypal email address in Products -> Product List -> Select your product and click on "edit" -> Payment Information -> Platform ID)
Payment Provider / Stripe
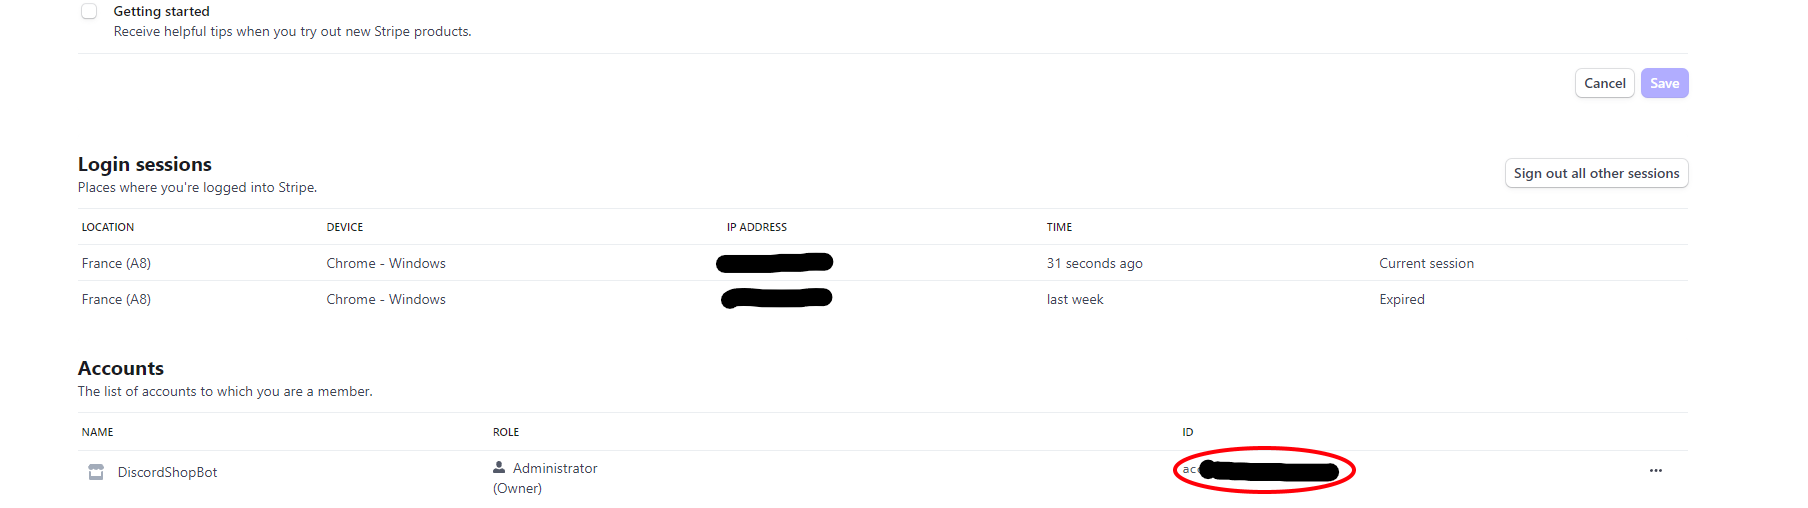
For Stripe, it is a bit harder but it is worth it! You need to have a stripe connected account . Once you have that, then head to your profile here, go to the bottom of that page and copy your account id (see image below) and paste it in the platformID input.
Price / Currency
Now, you need to put your product price and currency. I recommend you to choose your currency first. Note that if you choose Paypal as a platform, the minimum price is 7.5€ (or equivalent in other currencies) for a product. Whereas for Stripe, it is 2.5€ and you will have LESS fees applied to your payment.
Step Four - Product Automatic Actions
You can activate or deactivate the automatic actions you want. If you don't know what they are, please check this guide.
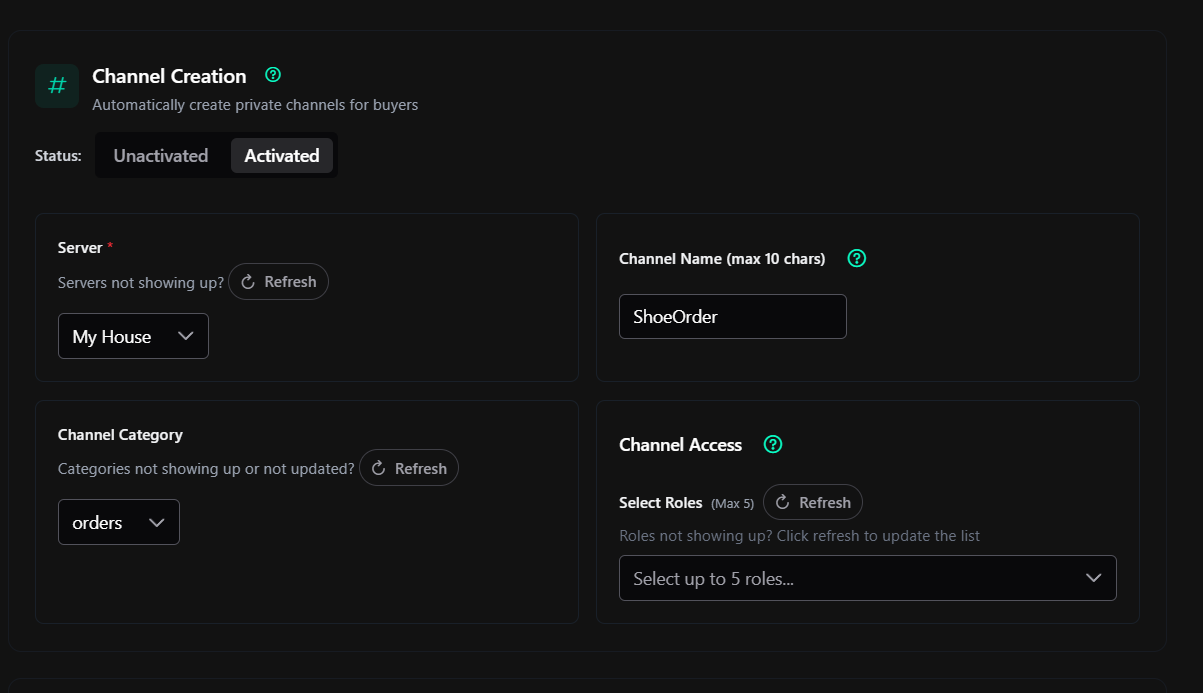
In our case we need the Channel Creation automatic action. Because we want to create a private channel for each user that buys our product to be able to inform them with the status of their order. So we will activate it.
We will select the server in which we are selling our product and the category where we want the channels to be created. We will also select the roles that will have access to the created private channels, in our case, because we want this channel to be private we will not select any roles (but if you have like a manager role that need to access every created channels, you can add it here), so only the buyer and of course, admins will have access to the channel.
For the Channel Name we will enter ShoeOrder, and ShopBot will automatically add an ID at the end of the channel name. So if the ID is 1, the channel name will be Private-1.
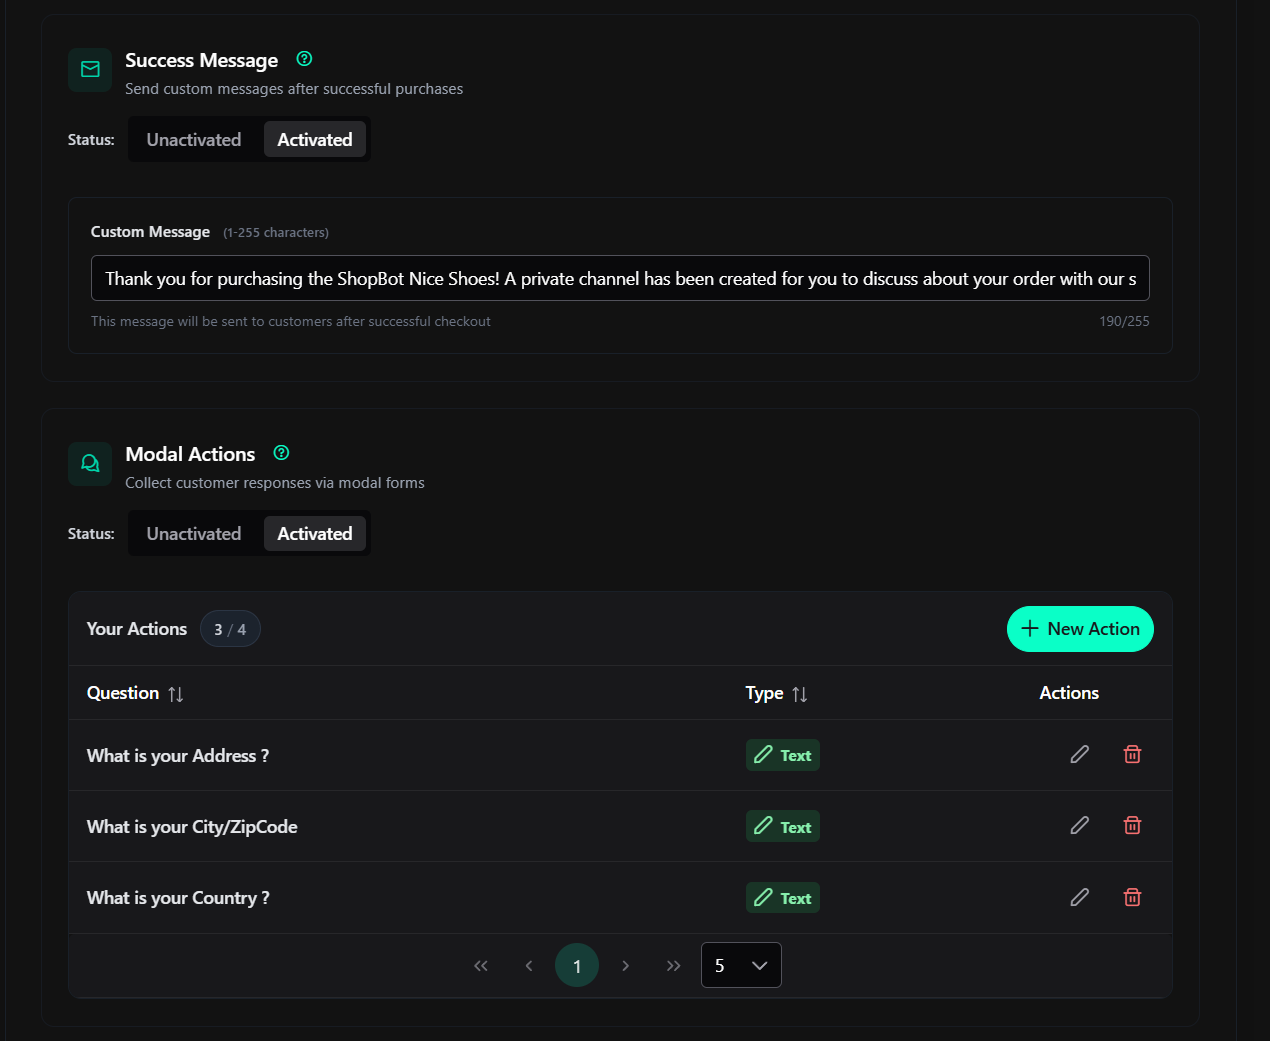
And because we want to reminde our buyer that a private channel has been created for them, we will activate the Custom Success Message automatic action. In wich we will put this message:
Thank you for purchasing the ShopBot Nice Shoes! A private channel has been created for you to discuss about your order with our staff. Please check the channel list for your order tracking.
And finally, we will activate the Purchase Pop-Up Form automatic action to be able to collect some information from our buyer.
The first one will be the Address, the second one will be the City/ZipCode and the last one will be the Country.
Here is my filled form:
Step Five - The Product Itself
Now we can select which roles are going to be given to the buyer.
The Server selector is the server that you want to sell the role from .
If you don't see your server in the list even after a refresh, thats mean that you didn't added Shopbot to your server. If you see a text saying that you have already selected a server, that means that you have already selected a server for the automatic action or an other step above.
Once that your server is selected, you will need to choose up to 5 roles that you want to sell on your server in the role selector.
::: warning
⚠️
All the role that you have selected MUST be UNDER the ShopBot role or it will not work (See animation bellow)
:::
(Here We want to put the ShopBot role higher than the role we want to add (here Role 1 ;2 ;3 ;4 ;5))
In our case we will select the Customer role.
After accepting the rules and conditions, we can click on Submit and our product will be created !
Second Step - Generating the product to our server
Step One - The Product ID
Now that our product is created, we need to generate it to our server. To do that, we will go to the Dashboard and we will click on Product in the side bar. Then we will click on Product List and we will copy the Product ID of our created product.
Step Two - Generating The Product
Now let's head to our server and let's type /generateproduct <Product ID> in a channel. If you don't know how to get your product id, please check the previous step. If you did everything correctly, you should see ad dicord embed representing your product.
And now we are done !
If you want to edit your product or add more stock, you can do it any time on the dashboard by clicking on Products in the side bar and then on Product List and then on Edit on the product you want to edit.
Additional Informations
Now that the product is generated, let's imagine that we have an order. We will see how to manage it.
Managing Orders
To see the orders, we will go to the Dashboard and we will click on Product in the side bar. Then we will click on Product List. Once we are on the product list page we will click on the Info Page button of the product we want to see the orders.
Inside this page we will be able to see all the orders of this product. We will be able to see the buyer name, the variant that he bought, the purchase date, and the status of the order (if the user answers or not the modal questions). If the user claimed his order, you will be able to see the answers to the questions that you asked him in the purchase pop-up form.